It is increasingly popular to build your own computer. In most cases,
it saves money, nobody can cheat on you, and it guarantees you get what
you want. It also assures you avoid proprietary designs many companies
use to keep you coming to them for new parts. Best of all, having built
the system yourself, you become very familiar with that system and with
computers in general.
Purchase/selecting the Components
The most difficult thing of building your own PC is finding the best
components for your budget. How much money do you have, what do you need
for that PC, which parts do I buy, which are the best, and what kind of
your job? These are the question that you have to think before you decide
to by the stuffs. This is the parts that you need for your computer.

1) The motherboard
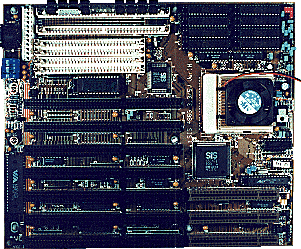
The motherboard is the main component on your computer that everything else plugs into. Sometimes it is called the system board.
Each component on the motherboard:
The CPU
 This is the heart of the
motherboard. It is the computer's brain. It's job is to process information
and sling information around to all of the various hardware that needs
it. For the most part your choices are 386, 486, 586, and "686". The 586
is the most commonly known as the Pentium (for copyright reasons); the
686 is probably for the new P6 (Pentium II). Anyway, it makes sense. 386es
are the slowest, "686"es are the fastest (and, not coincidentally, the
most expensive..). Actually, CPU's get two numbers that classify it. One
is the type (486, Pentium, Pentium II) and the other is the megahertz rating.
Both numbers are important in knowing what kind of CPU you have, and how
fast it is. Nowadays, the common speeds of CPU on the market are Pentium
(MMX) 166, 200, 233, 266 and Pentium II 233, 266, 300, 333, 350, 400Mhz
(and higher..). There are a few different manufacturers of CPUs, Intel.
http://www.intel.com/
being the leader and they are also the most expensive. AMD chips is
find too, without problem. And the other company is Cyrix.
Math Coprocessor
A math coprocessor greatly increases the speed of mathematical calculations. 386s don't have math coprocessors built into them--it's available as a separate chip. 486s have them if their name ends in DX. So a 486DX has a coprocessor, a 486SX doesn't have. A 486DX2 means that it is two times faster than a standard 486DX. Today's modern CPU's (Pentium) all come with a math-coprocessor embedded into the CPU itself, so don't worry about it.
Cache
A cache is a memory medium that provides faster access than the medium where the data is customarily stored. A cache memory architecture combines SRAM's speed with DRAM's cost effectiveness. It provides a small amount (usually 64KB or less) of fast SRAM (the cache) that is logically located between the processor and main memory (which is usually simple DRAM). If you have 8 MB of ram, should have a 128k - 256k cache, 16 MB should have a 256k cache, and 32 MB would be really swell with a 512k cache.
The BIOS
The BIOS is another very important part of your computer that makes its home on your motherboard. "BIOS" stands for Basic Input/Output System. It usually resides in a series of chips. If the CPU is the brain, the BIOS is the nervous system. It takes care of the behind-the-scenes stuff. The BIOS records what size hard drive, how much RAM, and other system information. Phoenix and Award are the big BIOS makers. Make sure you get the most recent BIOS chip possible and you may save yourself some problems.
The bus
A bus is the data path on the computer's motherboard that interconnects the microprocessor with attachments to the motherboard in expansion slots (such as hard disk drives, CD-ROM drives, and graphics adapters). What options do you have for the bus? ISA, VLB, EISA, PCI, and probably a few others. If you have a PCI bus, you plug PCI cards into it (like a video card). If you have an ISA bus, you use ISA cards. Many buses have both built in. VLB is also really common and faster than ISA. PCI is the fastest of the ones listed here, but the most expensive. 586 (Pentium) motherboards are PCI-based. The 586 PCI systems almost always include ISA and/or VLB slots too.
Integrated Circuitry
Usually, I/O adapters on the motherboard are of the IDE/EIDE interface
and they are marked HDD for hard drive and FDD for the floppy. You simply
plug your data ribbons into these and you can bypass the need for a separate
I/O card. The downside is that if you want to use a system other than that
on the motherboard, you have to disable the circuitry on the board.
2) RAM
 RAM stands for Random Access
Memory and it is where information is stored while the computer is on.
It is volatile memory, meaning all data is lost when power is turned off.
The RAM is used for temporary storage of program data, allowing performance
to be optimum. Having more RAM in your computer reduces the number of times
that the computer processor has to read data in from your hard disk, an
operation that takes much longer than reading data from RAM. The more RAM
you have, the more able you are to handle large amounts of data and big
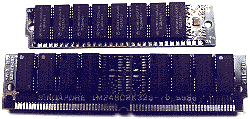
programs. The most common RAM chips are SIMMs (Single Inline Memory Modules).
SIMMs chips come in 2 sizes: 30 pin and 72 pin. Lower-end motherboards
usually use 30 pin, higher-end 72 pin. Some motherboards can take both.
In a 586 (Pentium) motherboard, 72 pin SIMMs must be installed in pairs.
The more slots on motherboard the better. You can expand RAM more easily
later.
Types of RAM:
SDRAM - synchronous dynamic RAM
Sending data from main memory to the system processor is consistently one of the biggest performance bottlenecks in any PC. Even the fastest standard DRAM and EDO memory cannot keep up with the 66-MHz bus speeds used on many Pentium systems. SDRAM incorporates new features that allow it to keep pace with bus speeds as high as 100 MHz. It does this primarily by allowing two sets of memory addresses to be opened simultaneously. Data can then be retrieved alternately from each set, eliminating the delays that normally occur when one bank of addresses must be shut down and another prepared for reading during each request.
DRAM - dynamic RAM
DRAM is the Hershey's chocolate of readable/writable memory: it's not the best, but it's cheap, does the job, and is available almost everywhere you look. DRAM data resides in a cell made of a capacitor and a transistor. The capacitor tends to lose data unless it's recharged every couple of milliseconds, and this recharging tends to slow down the performance of DRAM compared to speedier RAM types.
EDO RAM - extended data-out RAM
This form of dynamic RAM speeds access to memory locations by working on a simple assumption: the next time memory is accessed, it will be at a contiguous address in a contiguous chunk of hardware. This assumption speeds up memory access times by up to 10 percent over standard DRAM.
SRAM - static RAM
SRAM is like DRAM on steroids. Since it stores its data in capacitors
that don't require constant recharging to retain their data, it performs
better (though it is pricier to produce). SRAM is typically used for secondary
caches because its speed falls somewhere between that of DRAMs and a CPU-based
cache (typically 8ns to 20ns, as opposed to 60ns to 80ns for DRAM).

3) Hard-Drives
There are 2 types you can go with hard drives: IDE (and EIDE) or SCSI.
I) IDE: Integrated Drive Electronics
The IDE "bus" only supports two devices - master and slave per controller. But the advantages are much lower price and equal or greater speeds than many SCSI drives. Also IDE drives are the de facto standard for PC's and everything is compatible with IDE.
Nowadays, the memory on the hard drives on the market are 2.1GB, 3.2GB,
4.3GB, 6.4GB, and higher.
4) The Floppy Drives
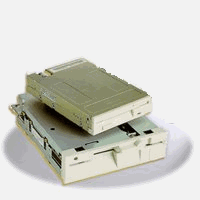
The floppy drive is one of the easiest parts of the computer to work
with. And, considering other parts, there isn't that much to know about
floppy drives. These puppies come in two flavors: 3.5 inch and 5.25 inch.
But I have never seen 5.25 inch for a long time. These diskettes come in
different densities. The old ones are single-density. They only hold 720K
of data. The standard disks of today are called high-density. They usually
hold 1.44MB of data.
5) Sound Cards
Today, with sound cards being so affordable, it is a piece of cake to turn your PC into a high-fidelity sound system. And, with even common business software using sound now, a sound card is a requirement for most software. The first, and most important, feature is what type of MIDI (musical instrument digital interface) synthesis your sound card will have. MIDI is just a set of commands issued by the application that tells the sound card which instrument to play, at what note, and for what duration. The superior method of MIDI synthesis used on some modern soundboards is called wavetable synthesis. A wavetable lookup synthesizer uses digitized samples of actual instrument sounds that are stored on what is called a wavetable. However, not all wavetable cards have the same amount of stored samples. Some cards have 4MB of samples while others will have 8MB. 3-D sound effects are also included on some cards. Whether the system used is SRS (Sound Retrieval System), Q-Sound, or Spatializer, it is designed to improve the perceived stereo effect of your speakers.
If you head on over to the computer store in your area to buy a sound
card, you will find that there are now numerous PCI versions available.
The PCI bus, on the other hand, offers a 100-MBps bandwidth or higher.
Several simultaneous sound channels are no problem for the PCI bus.
6) Video Cards
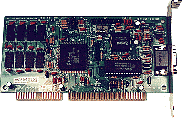
The video card is the basis of your display. It contains all the circuitry relating to your computer's ability to send a picture to the monitor. When buying a new video card, it needs to be matched with the monitor. It is best to buy the video card first, then buy a suitable monitor. Most video cards these days are accelerated for graphical operating systems. For instance, a 1 meg card usually will only allow 256 colors at 1024x768 while a 2 meg card usually allows at least 16-bit (about 65,000 or so) color. You need 4 meg of video memory to use 24-bit (true color: 16 million) color at 1024x768.
What makes a video card faster is the type of memory on the card. DRAM
(Dynamic Random Access Memory) is used on the majority of video cards these
days. VRAM (Video Random Access Memory) is different than DRAM in that
it features a dual-ported design allowing two devices (the CRT controller
and the CPU) to access the memory at the same time. Some companies are
now using EDO RAM that is supposed to reduce memory access time by an average
of 10% compared to standard DRAM.
7) CD-ROM and DVD
CD-ROM

CDs are now the main medium for distribution of software. CD-ROM drives are turning into a must have. Lots of software is distributed on it, and if you want to do any multimedia, you pretty much have to have one. A single CD can hold about 650 MB of data and it costs less then a dollar to make. CD-ROM players come in many styles. They are both external and internal. They also come in different speeds. The speed compares how much faster it is than a standard audio CD player. A 2X drive is twice the speed of your stereo's CD player, and so on. Technology has advanced quite a bit. Today, 24X or 32X is standard. CD-ROMs are becoming more and more advanced as time goes on. They are getting faster and cheaper now.
DVD

There has been a lot of talk lately about the advances in DVD. Many
claim it to be the next step beyond the CD-ROM. The DVD acronym is a little
vague. Some call it Digital Video Disk while other call it Digital Versatile
Disk. It doesn't really matter, though. It is indeed the next step beyond
CD-ROM. Each disk can hold anywhere from 4.7GB to 17GB! A standard CD can
hold only 650MB. While this is good, DVD also plays a big role in bringing
the computer to the level of the TV. Many movies are now distributed on
DVD-ROM. These movies often allow the user to select custom camera angles
or view it in different languages. A DVD drive come with more than just
the drive. Most kits come with the ATAPI/EIDE drive, an MPEG II decoder
card, and various cables and sample software titles. While they are a little
more involved than installing a CD-ROM but it's not that hard.
8) Cases

The case is that metal and plastic box you see when you look at your
computer. Most people don't think of it as an important part of the computer.
It supports the parts of your computer. It seems easy to find a case, yes!
But not a good one. Lots of them are scrawny thin tin pieces of junk. If
you can inspect the case, here are some things to look for:
- Does it feel physically sturdy? - Can you twist it easily?
- Is it big enough for all the components you need to put in there?
- Will things be easy to access once they are installed?
- Is there enough space to work inside the case easily?
A clean case with lots of space inside helps the air-flow through the
system. Also, a closed case's design actually helps to funnel the air through
the system over the components that need it, such as the CPU. The two main
types of case are the tower and the desktop. A tower is the most common
and is taller than it is wide. The desktop's main advantage is the placement
on the desk and space saving design. It is not a good cooling case. Make
sure your case comes with a power supply, or you'll have to buy
one. The power supply is a very important part of your computer, and also
the most likely to fail. Today, they go as high as 500 watts. The average
computer today uses 230 watt or 250 watt.
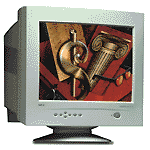
9) Monitors
Monitors are not important because of their impact on performance, but
their impact on the usability of the PC. A bad quality monitor can hamper
the use of an otherwise high tech PC simply because a monitor that is hard
to look at can make the PC hard to use. There are many kinds of monitors.
An EGA monitor works with a 9-pin connector and the EGA video card. EGA
screens can show 64 different colors. VGA monitors use a 15-pin connector,
setting them apart from RGB and EGA. VGA monitors can show millions of
colors.
10) Keyboard
There are a ton of keyboards on the market. Some keyboards have a trackball
built into them. This item is up to you. Go for it if you want.
11) Other
Mouse
A mouse is a small device that a computer user pushes across a desk surface in order to point to a place on a display screen and to select one or more actions to take from that position. A mouse consists of a metal or plastic housing or casing, a ball that sticks out of the bottom of the casing and is rolled on a flat surface, one or more buttons on the top of the casing, and a cable that connects the mouse to the computer. As the ball is moved over the surface in any direction, a sensor sends impulses to the computer that causes a mouse-responsive program to reposition a visible indicator (called a cursor) on the display screen.
Network Interface Card
A network interface card (NIC) is a computer circuit board or card that is installed in a computer so that it can be connected to a network. Personal computers and workstations on local area networks (LANs) typically contain a network interface card specifically designed for the LAN transmission technology, such as Ethernet or Token Ring.
Modem
A modem modulates digital signals from a computer or other digital device to analog signals for a conventional copper twisted-pair telephone line and demodulates the analog signal and converts it to a digital signal for the digital device.
Removable Storage (Zip drive)

Today, with the heavy use of computers, data storage and data safety
is of the most important. The Iomega ZIP drive basically started it. It
is pretty cheap, holds 100MB per disk, and is a snap to install and use.
The ZIP drive is best for backup purposes. While you can run files off
of the disk itself, the speed is not adequate. The drive is only 4 or 5
times faster than a standard floppy drive.
After you know the component of the PC, it is the time to make your
decision
to buy that stuffs on your budget and you need. There are tons of different
sources for parts to build your own machine. Hit some of the local stores
in your area and see what they have in stock. Also you can also pick up
a copy of Computer Shopper which has about a million ads in it. Have fun
choosing your stuffs!!
Put everything together
After you get everything, it is the time to put everything together.
Step-by-Step

BIBLIOGRAPHY
Books:
World Wide Web sites: